
Okay, technically you can, but would you want to?
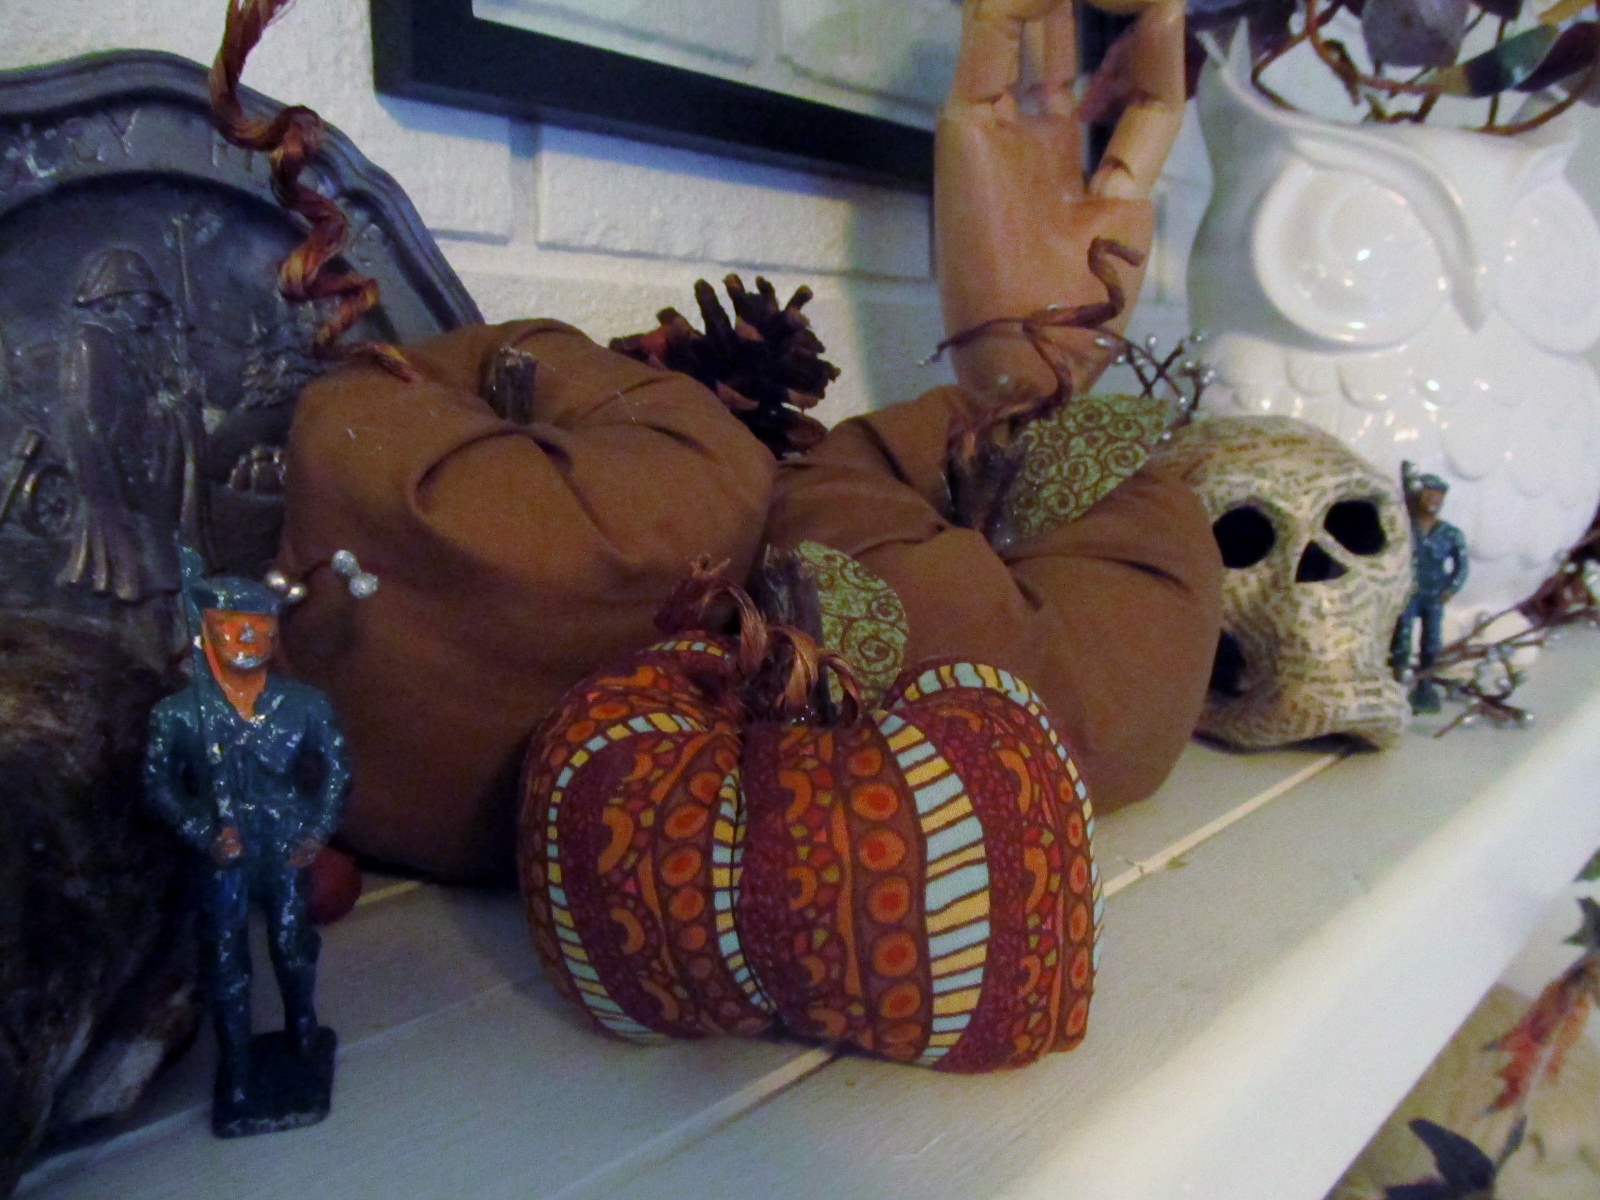
Luckily for you, I have the how to prepped & ready to meet all your stuffed pumpkin needs. In my case, the need was to fill in a corner on our mantel. Your need might be for a centerpiece or an ornament or a Thanksgiving party favor, or any other instance when a stuffed squash would come in handy.
Trust me, they'll come in handy.
Like the owls from last week, a good stuffed pumpkin starts with rectangular pieces of fabric of your choice. Orange would be obvious, but anything you 'appen to 'ave lying about will do. In my case, I had a bit of plain light brownish and a bit of curvy orange stripey-ness left over from the garland.
Cut two rectangles in each fabric, whatever size you want {smaller is easier than larger for reasons that will become clear as we go along}. Also, as with the owls, this is simple enough to be sewn by hand if you don't have a machine.

Stitch up the two long sides of the fabrics {right sides together}.

On one of the short sides, baste the two pieces together {basting, in sewing, means long, loose stitches}. Knot the thread on the side you start sewing, but leave long pieces of thread and do not tie off the thread at the end .

Gently pull the long threads, scrunching the fabric down toward the side you knotted. This does not have to be perfect, so don't worry about gathering evenly.

Once you've gathered it to your liking, sew over the gathers to prevent them from loosening up again.

Trim the seam allowances, then turn the little bag you've created so the right side of the fabric is facing out.

Stuff your pumpkin with whatever you have that is soft, smushy & lying around. I had left over stuffing from the owls. Don't over stuff-- leave a few inches at the top, and stuff it "loosely," don't pack it in.


Baste the top closed-- don't worry about the raw ends. I sewed this bit by hand.

Like you did for the bottom of the pumpkin, gather the top of the bundle then sew the gathering closed.

Now here is the tricky bit. Using a hand needle & a loooooong thread with a knotted end, push the needle down from the top of the bag, through the center, and out the bottom {being careful not to stab yourself in the process}. This moment here is why a smaller pumpkin is better, especially for your first squash experience.

Once you've pulled your needle out the bottom, pull tight {but not so tight you snap the thread}. Tie off your thread, then repeat in the opposite direction {bottom to top}. Each time you do it, you'll be able to pull the pumpkin a little tighter which gives it a nice pumpkiny shape. Repeat until you are happy.

The rest is easy-- just embellish! I used my glue gun, a stick from the front yard, a scrap of fabric cut in a leaf shape, and some raffia covered wire left over from this project.


Ta-Da! Cute huh?

Next week, we are finally off the mantel & on to the wall {lol}.

Heads up: it will require you to have a beautiful mother with a green thumb, a surplus of hydrangea blossoms & an eagerness to send you home with a bushel full, or a reasonable equivalent of same~*
So, what are you gonna make today?

While you are at Polka Dots & Lemonade checking out Handmade Happy Hour, be sure to enter her giveaway for a $50 credit at Shabby Apple!


Those are super cute!! Thanks for following and good luck on the shabby apple giveaway!
ReplyDeleteCute pumpkins! They look great with your cute owls :)
ReplyDeletewhat a fun idea. They turned out very cute. I am following you, would be great if you stop by my blog and follow (only) if you find it interesting :)
ReplyDeletewww.abi-asaturdaymorning.blogspot.com
Abigail K
SO very cute! I did a similar pumpkin using a sock instead of fabric, super easy but not as cute as these. I actually love the little leaf in the green fabric too. I found you from Loving Lately link up and love your blog. I'm totally following now and pinning this!
ReplyDeleteSo adorable- that mantle is quite something!You are impressively busy this fall.
ReplyDeleteI love your mantel!! And your pumpkin turned out so cute!
ReplyDeleteWow, that is soooo cute! Great!
ReplyDeleteSo fun... I love the mantel.
ReplyDeleteAloha,
Following ya now and forever and ever from the GFC hop. We're riding the wave of life together at localsugarhawaii.com and I would so love to have ya with me on this great adventure. Come join us!
xoxo,
Nicole
localsugarhawaii.com
Oh crap. You are fun and crafty. Amazing. Our puppy totally just ate my cute stuffed pumpkins that i got yeeeaaars ago at a craft store, but because of YOU i am going to make some with this awesome fabric i bought to recover a chair (then i realized i don't actually do things like that), but pumpkins with the kids i can do! Love this post!
ReplyDeleteI think all I'm going to make today is a drink, honey! I love your pumpkins but I am afraid of sewing! ;)
ReplyDeleteWOW! Your mantle is amazing!
ReplyDeleteLOVE! Just another reason to learn to sew! :)
ReplyDeletehow cute did this turn out?? found and following via the blog hop! :)
ReplyDelete