
I'm sure you've all seen of this neat little trick for breaking off the tops of bottles. Well, it works-- though we have not perfected it yet--
The pictures below are from our second attempt at it-- I didn't photograph the first as we did it late in the evening rather spontaneously and weren't sure it would work. It did, and you can see the finished products in a moment~*
Supplies:
- A bottle you'd like to turn in to a vase
- Pure acetone {nail polish remover works as long as you check that it is pure acetone, or you can buy a can of it at any hardware store}
- A ceramic vessel in which to pour it-- don't use plastic, it will "melt" & don't use anything with a finish you'd like to keep
- Yarn-- we tried with twine, but it didn't work as well as good, cheap yarn
- A container with cold water large enough to submerge the bottle in. My hubby was makings sauce with the last of our farmer's market tomatoes to freeze for winter so the stock pot was unavailable. We grabbed our huge, aqua blue picnic pitcher which worked fine
- A form of fire {we used a big ole' lighter}
- Safety glasses {just in case} and fire proof gloves-- we didn't use any gloves & no one was even mildly hurt, but I would hate for someone to get injured if I didn't include safety precautions!
- A bored teenage boy {Thing 2, in my case} who has a fascination with fire just this side of pyromania & no of fear of being burned

I actually added more yarn after the above photo was taken...

Pull the yarn off the bottle in the circle shape and dunk it in the ceramic vessel holding the acetone. Really soak the yarn-- the idea here is to get it to burn for a while, heating the bottle along the line you want it to break.

Put the yarn back on the bottle, settling it in place as evenly as possible & light it on fire!

You'll notice in the above pic the flames go up. That isn't what you need. Here is where the teenage boy comes in. Thing 2 picked up the bottle & held it nearly horizontally, rotating it around to get the fire to focus and burn along the yarn where we wanted it to break. Getting it to heat the yarn evenly is the trick we've yet to master--the bottle will break wherever it got the hottest.

I do not have a picture of him rotating the bottle. Right after the above pic was taken, I regressed into Mommy-isms along the lines of "oh be careful!" and "don't let catch your hair on fire" and "hold it away from you" and "that's enough! that's enough!"
After you are nearly certain your son is going to combust, have him dunk the bottle in the water quickly. Catching the bottle by surprise is essential~*
You'll hear a pop, and the top will break off!

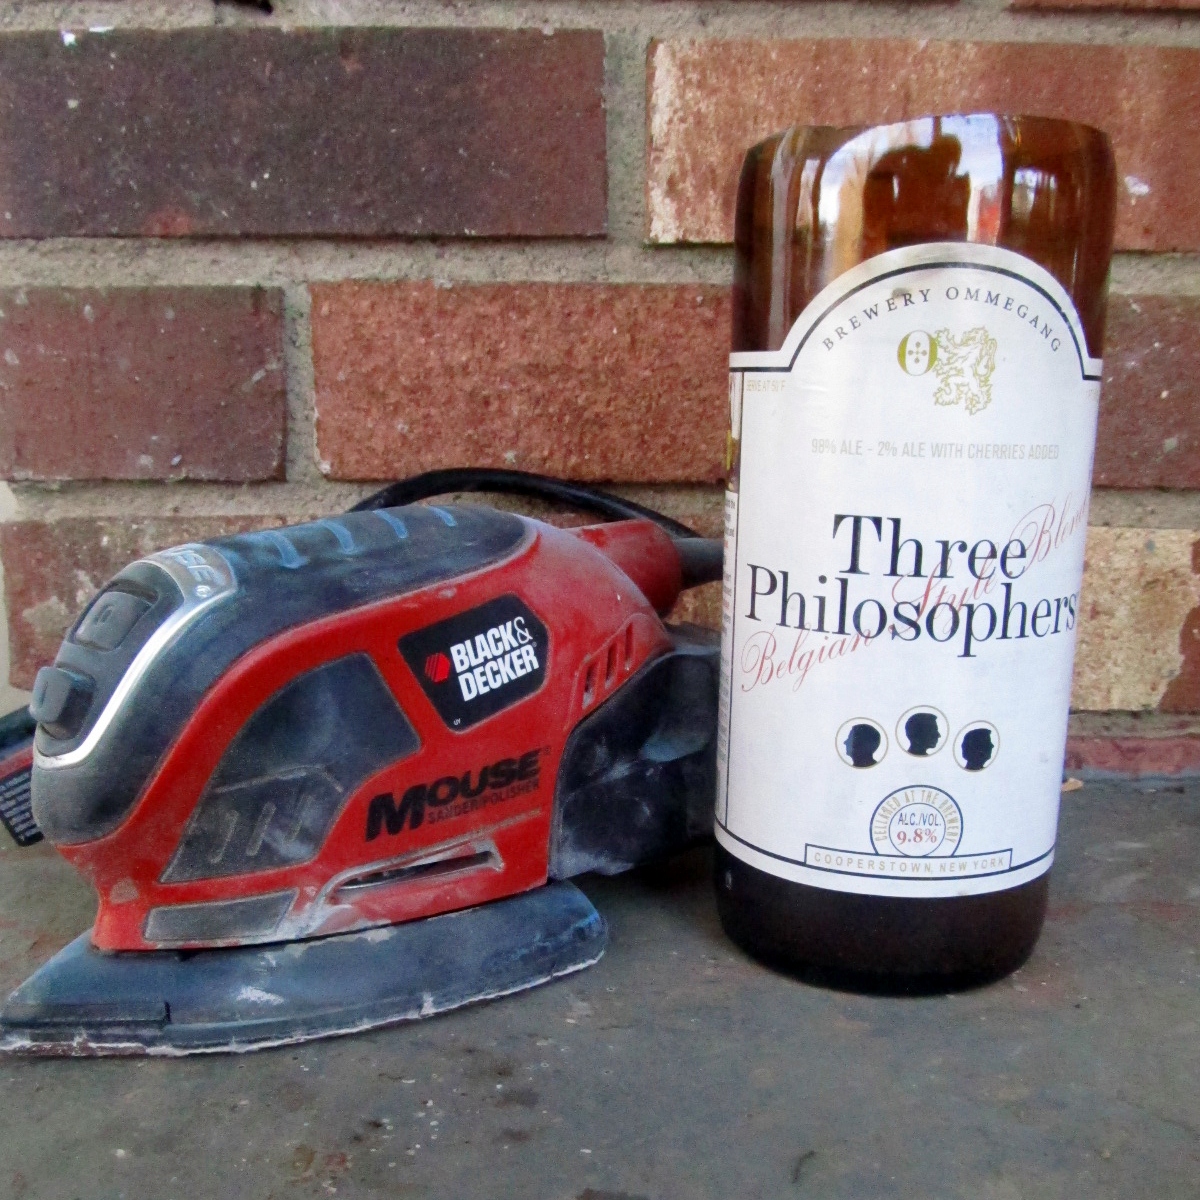
Smooth off the edges with sandpaper. Our break was rather uneven on this bottle, so I got out my Black & Decker Mouse sander {which I love and have named Basil} and had a go using a fine grit sandpaper.

The finished product is not near smooth or level enough to drink out of, but you can't cut yourself on it & it makes a smashing grand vase!

As I said at the beginning the Three Philosophers bottle was our second attempt. We started with a Leute Ale bottle. And we aren't done yet, we have more bottles to try-- Thing 3 has an addiction to French sodas that come in lovely curvy bottles, Thing 2 loves IBC rootbeer, & we all drink Mexican Coca Cola-- made with real cane sugar {as opposed to corn syrup as made in the USA} and served in tall old-fashioned bottles {as opposed to the short novelty bottles sold in the USA}.

As an aside, based on the popularity of Mexican Coca Cola in the USA, one would think the Coca Cola Co. would start producing all its products with real cane sugar & tall glass bottles. Anyone know why they don't? I'm guessing its cheaper to make it in cans with corn syrup & they can get away with it. Oh, and that reminds me of something annoying I overheard that I obviously couldn't address at the time I heard it seeing as I wasn't a part of the conversation. While we were purchasing a flat of cola from Sams Club this past summer, two people were discussing why they won't drink cola from Mexico in a rather racist way. The gist was that they thought they didn't have health standards "down there," because they had purchased some bottles of it, left it in their car for a while, and when they drank them there was a dark residue at the bottom of the bottle. Again, these folks were obviously ignorant just based on the terms and slang they used while discussing this, but anyway. The FDA has to approve all food and beverages that come in to the country-- they have to meet the same standard as companies in the US {with the exception of labor cost}. The reason there was a residue was because the heat of the summer in a closed automobile combined with the cane sugar-- it caramelized. Phew. Thanks for letting me get that off my chest, I've been holding it inside for months now lol.
We are hoping to get good enough at it to make a little set of juice glasses & even a gift or two...
Oooh it would be a great anniversary gift-- making a vase out of a bottle of champagne that was served at the wedding...hmmm.....


The whole time we were working on this project I kept wondering why we hadn't thought of it back when Thing 2 had to do science fair projects. It fit all his usual criteria-- it involved fire & a bit of controlled danger. Ah well.
Thing 2 has a few ideas on how we can level out the break line, and I'm going to get a different grit sandpaper for Basil for us to try this weekend-- we'll get our glass set yet!

This looks SO fun and dangerous! I must try it.
ReplyDeleteWhoa cool! I have never seen that done before but it's a pretty amazing experiment, plus the added bonus of the vase. Fun stuff!
ReplyDeleteThis is awesome! Im going to have to try it some day! :)
ReplyDeleteCute idea, I'm too nervous to try something like it though, lol
ReplyDeleteFollowing from the blog hop :)
http://brownsistacrista.blogspot.com/
this is very cool! I really like the vases. This is a diy I've wanted to try out for a while but am a little hesistant to. Thanks for your easy steps.
ReplyDelete