Showing posts with label Tuesday How To. Show all posts

Tuesday, August 13, 2013

Back to the House Tour: Our Bedroom

After a few how tos, its back to the house tour!  After a year of pondering, we finally repainted our bedroom from a dusty lavender to a fine spring green.  In a fit of redoing we rearranged the furniture as well which has made us rather happy~*


Excuse the blurriness in the above photo.  I used a panorama maker to try and get the full width of the room and rather enjoyed the odd effect & shifting shadows.


The cubicle shelves are actually 2 inexpensive closet organizers attached first to each other, then to the wall using L-brackets for stability.  They make for a lovely display cabinet for some of our treasures.


We keep our comic book collections & adipose (Dr. Who reference) & other nerd collectibles, as well as a gorgeous first edition Alice in Wonderland my parents got me, with illustrations by Arthur Rackham.  We also have a few sweetheart postcards from Germany in World War I, and other goodies.


Here's a quick how to tip: to match disparate objects, use a common color.  Our two bedside lamps are different styles, but I spray painted my foundling brass lamp with a silver spray paint to match Jeremy's Pier One sale find, then purchased two matching burlap lampshades.  Visually they match up nicely, as do the bedside tables which both feature wicker.  Similarly, I tied in a variety of etsy art finds by using matching black frames: two with white mats, and two floating frames.   
We've got our summer weight blanket on the bed for obvious reasons: the duvet and feather quilt are safely stashed under the bed waiting for the colder months.  Our bed always looks rather lumpy because I have a feather-bed topper...well, that is a lie.  I have numerous feather bed toppers all stacked up like the princess and the pea atop our normal mattress and boxspring.  It makes for a lumpy, over stuffed look, but its positively heavenly to sleep on.


My bedside table is made from two seagrass baskets, which make perfect storage for winter scarves and gloves.  Just enough room for my Fire, my favorite picture of Jer and I and the anniversary card he gave me this year.
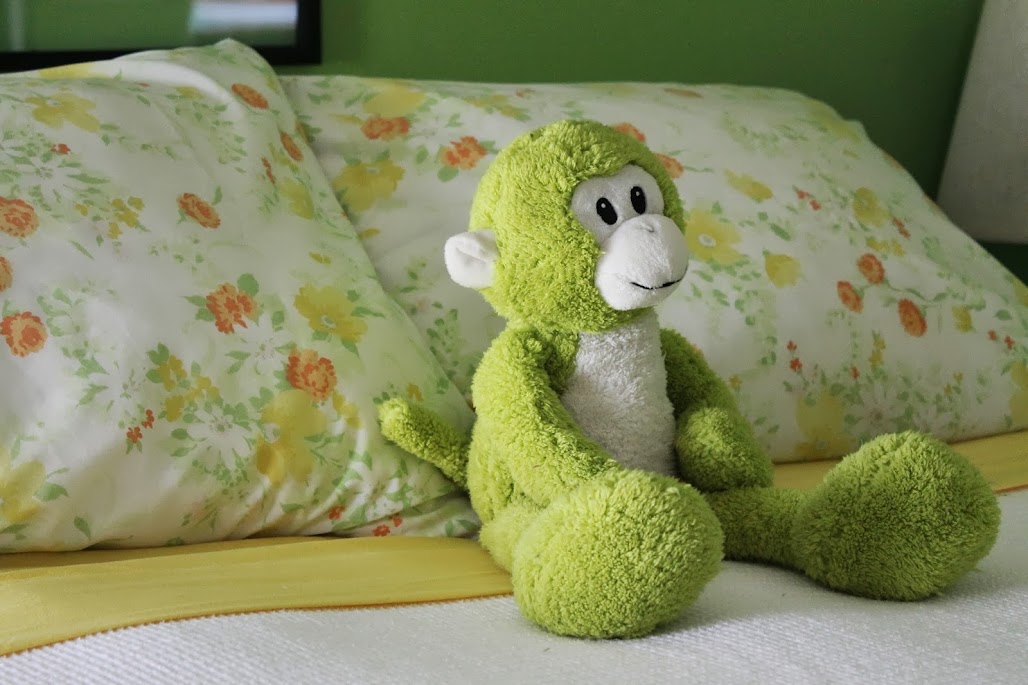

I've picked up a few pairs of vintage pillowcases with lime green accents-- these yellow and orange and another lavender and aqua, both florals.  I picked up matching sheets for each set of pillow cases.  The monkey was a gift from Santa 3 Xmases ago.  I call him Limón, because what else should I call him~*

Going clockwise from high noon: Cori Dantini, Shelli Dorfe, Eszter Schall, Alison Jardine

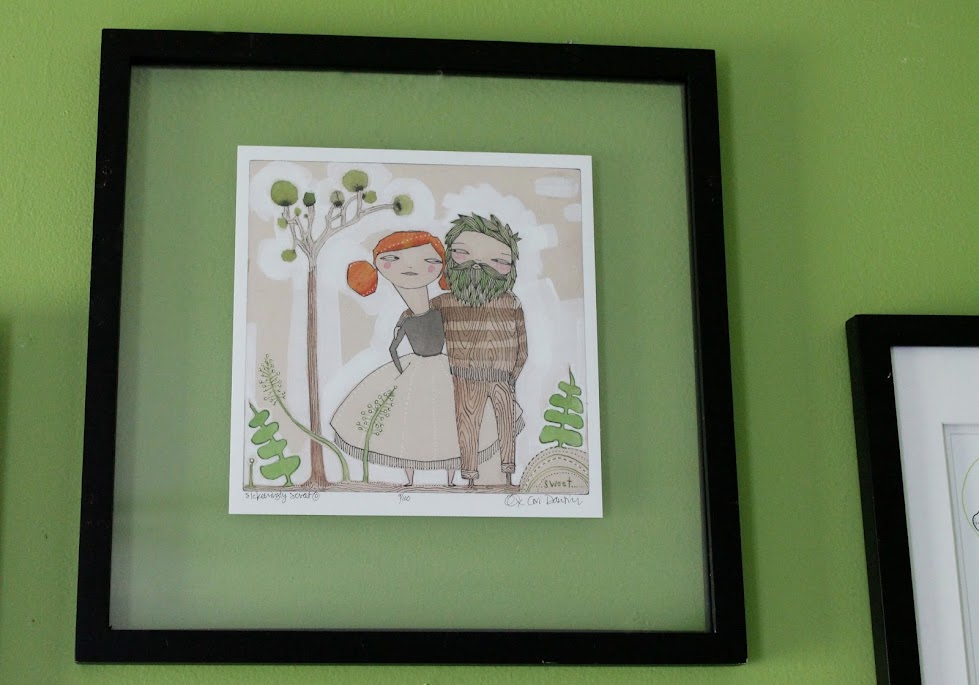
We think of this print as our portrait.  The artist, Cori Dantini, is one of my favorites &, as you know if you've read here a while, I adore supporting etsy artists.


Jer's bedside table is a dark wicker topped plant stand-type table with two drawers for all of his gadgets.  His Fire, glasses, collected cards & favorite photo of us fit snuggly, and he recently hung a leather strand from which one of his finer collectibles, a trench art ring from 1917 from the lamp switch.  I like it.  It can stay~* 


I've collected a lot of old mirrors and frames which we are hanging on the wall across from the window.  They reflect the light wonderfully.  


The trunk at the foot of our bed holds two colonial tricorns we had made for our wedding.  And yes, we wore them.  They are fantastic.  Mine is the green, his is the blue.  And the pig is for good luck.  


And the last little bit you may have seen in the video of Poosh I put up the other day.  Its the dog bed for The Doctor {our immensely overweight beagle}.  We had purchased a regular dog pillow, but it soon got rather nasty looking what with Doctor rolling on it and Poosh tearing holes in it just because he could.  I took and old fleece blanket and sewed an envelope pillow cover for the bed, then stitched a lap afghan to the top of that.  Now if it gets too dirty, I can slip off the cover and give it a quick wash without any hassle. 

So there it is, a tour of our bedroom with a little how to advice thrown in for good measure~*


post signature

Tuesday, August 6, 2013

Rain Boots & Plants & A Sunny Day in the Garden

Two autumns ago Bayley bought Thing 3 a pair of Elmo rain-boots.  And she duly wore them in the rains of fall until the day she took them off on the front porch and forgot about them.  They've been there ever since, perched and ready, next to the door just waiting.  And I grew accustomed to their presence.

They became something akin to a spider condo this summer.  But they were better than that.  They needed a new purpose.


I decided to use Tradescantia, {Purple Sabre} because it grows anywhere.  I've managed to keep this plant alive four years now, despite my best unintentional efforts to kill it.  I recently put it in a big planter where it has thrived in the recent rains.  When it gets too long, I break off pieces, poke a little hole in the garden soil, and set them in.  And they are growing.  Its so cool.

And given that hardiness, I figure it would be perfect for growing in rain boots.


To be perfectly honest, I'm continually amazed that anything manages to grow in our garden.  Not that we don't try & not that I don't care.  I do.  I'd love to have a beautiful cottage garden spilling over with all sorts of fine pretties.  Sigh.  


One of these days I'll figure out how to garden...


post signature

Tuesday, July 30, 2013

Pretty Pretty Paper Roses

We are taking a break from the house tour to do a traditional how to post, just to keep ya'll on your toes.
This is an oldie but a goodie of a crafty treat.  So simple & sweet & so many uses.  If you take a quick peek at ScoutMob or Etsy or any other craft boutique, you can find dozens of artists who utilize paper roses in the most fantastic ways.

Paper Garland by Lillie Syster; Paper Wreath by 7 Silver Keys ; Map Roses Bouquet by Dragon Flies
You'll need paper of any sort, though it is best if both the front and the back are colored/printed or at least interesting to you, since both sides will be visible.  I used simple scrapbooking paper with a gingham print on one side & a cardboard/craft paper brown on the other.  Old book pages make a wonderful paper rose, as do maps, magazines or newspaper.


Now draw a spiral shape on one side of your paper.  Once you get  the hang of it, you won't need to draw the spiral, you can just free-cut.
People who sell these roses use a adjustable circle cutter to give the roses a uniform appearance.  If you were going to do a lot of flowers, either for a long garland, paper roses wreath or other undertaking, I'd recommend plopping down the dough to pick one up.  For small scale projects, I prefer the hand drawn/hand cut method-- it gives a lovely variation to the blooms and feels more "natural."


Cut around the spiral, squaring off the hanging end.


Start on the outside and roll towards the center.  The paper will naturally "lean" toward the inside of the spiral, just let it do its thing!


When you get to the end of the spiral, fold the last bit of paper under to form a "table" for the rose to set on. Allow the curled paper to loosen up a tad, apply some hot glue to the "table" and press down to adhere.


Depending on what you are going to do with the roses, you can cut a stack of paper at a time.  The rolling of the spirals can be done by children & even craft-challenged husbands~*


Once you've got the roses rolled, you can do whatever you want with them-- bouquets, wreaths, garlands, card embellishments, shoe box decoration-- the possibilities are endless .  

If you do make a bouquet, might I suggest spritzing the finished stems with a little rose water.  Thus they would. by any name, smell as sweet~*

My little garden is going to be used on the lids of some Papier-mâché boxes-- look for the finished project in a post to come!

This post can also be found as an article in the blog magazine Man Cave Mum.  Please come by, show your support for a great starter mag & check it out!

post signature

Tuesday, July 23, 2013

House Tour: Thing 3's Bathroom~*

This is Thing 3


And this is Thing 3's bathroom!


You may remember we did a room redo for my teen angel earlier this summer.  Sort of a Sponge-Bob-Meets-Under-The-Sea thing with a little Bending with Beckham thrown in for good measure.

You can see the complete redo here

We kept the theme going for her bathroom.  A word on this bathroom.  It was in miserable condition when we moved in-- truly terrifyingly icky.  Not only had it been abused by the drug addled previous tenants, but it had been redone in precisely the ways you should never redo the bathroom.  We've been slowly fixing it up.  The biggest problem is the tile.  Now tile is lovely & we have nothing against it persay.  But when this room was tiled, the DIY'er that shouldn't have done, applied the tile straight to ordinary dry wall using what appears to be carpet glue.

Yeah.

We haven't fixed the tile in here yet-- we just worked around it.  So excuse its obvious flaws~*

Anyway.

Thing 3's bathroom needed a teen treatment, so that is what we went with.  We used a deep blue & grass green to color block the walls-- the stone peel-n-stick tile we put down way back when was left as is.  On the little half wall directly adjacent to the door, we hot glued an assortment of fishies that we got from Amazon.com.


We left it simple-- though I am tempted to get her to let me do an aquarium mural around them.  We'll see...


We also got a handful of cheap leis from the dollar store to trim out her mirror & ride the border between paint jobs around her shower.  It was an easy, nice happy touch.  Add a fishy shower curtain, a spring green organizer, a few extra lei flowers scattered around & matching floor mats and we were mostly done.


The final touch was a little succulent/cactus garden for her window sill & some inexpensive plastic blinds for privacy.


Even Poosh approves of Thing 3's tropical commode~*


post signature

PS
I've done a quick update of Thing 3's art page.  She's working on a camel's travel post...I think you'll love it, whenever she finally agrees its done.  Pssh.  Artists.

PPS
On a completely unrelated note, I've been featured over at Crafty Spices!  Be sure to check out the sweet article Jay wrote about The Closet & let her know I sent you over!